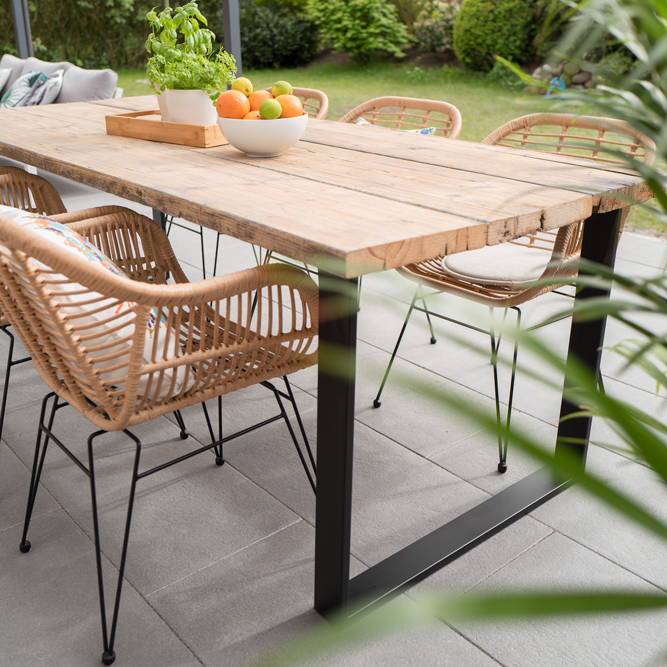
Julia aka @Juliaweisshome Was so nice and made us part of her DIY project. In a summer she had received a few old scaffolding planks and planned to use them in a rustic dining table for her terrace in the garden. Said and done! We were allowed toFurniture guns rectangle contribute and give the table its final look.
HERE WE GO
Of course, it does not necessarily have to be scaffolding planks for your dining/garden table, other woods or even entire panels are suitable for this project and then only require individual protection/glaze depending on the material.
What do we need to get started?
- 3x scaffolding planks
- 2x furniture gaps rectangle
- 1x screw screw (Size depends on runners and thickness of your material)
- Circular saw/foxtail or the like to shorten the boards to your desired length
- Grinding machine or paper
- Brush & hard wax oil (important: make sure that it is water -repellent)
- drilling machine
- College and pencil
- Possibly a tarpaulin/surface so that the planks are not damaged by the surface when attaching the runners
STEP 1
Now decide on your desired measure and set out to cut the Bohlen into the right length. A circular saw or a foxtail will help you.

STEP 2
Now you can start grinding the planks directly. Rundles the edges as desired and grind as much as you think is right. Remember: the more you grind, the more you lose the look of the wood!


STEP 3
After you have sanded the planks well, please clean the surface before you go on the next step. Dust and fine wooden particles can become a problem and should be removed from the wood before it goes to paint.
Now take your, at best water-repellent, oil (hardwax oil is recommended) and so that you paint your wood according to the instructions of the respective product. Take a brush to help you.


Step 4
After your planks have dried (please also pay attention to the instructions from the manufacturer again), you can start with the assembly of the table runners.
Julia chose a classic: the Furniture guns rectangle. You have the opportunity to choose between the colors black, white and industrial.
Now you proceed as follows:
- Place the planks on a, ideally protected underground, and align them as they should be later (whether distances or not, is up to you). In order to ensure full stability and a flat surface, the planks should be put together with a base/cantwood before assembly.
- Now place the runners to the respective ends (please pay attention to our recommendations at intervals! (For example, table end with a 350mm distance to the table edge place the runners)
- Now draw the holes and drill them
- Now you can place the runners again and the Screw insert 🔩


Step 5
Almost there! Turn over the table and see if everything is properly aligned and is stable. If this is the case, you are ready! 💪
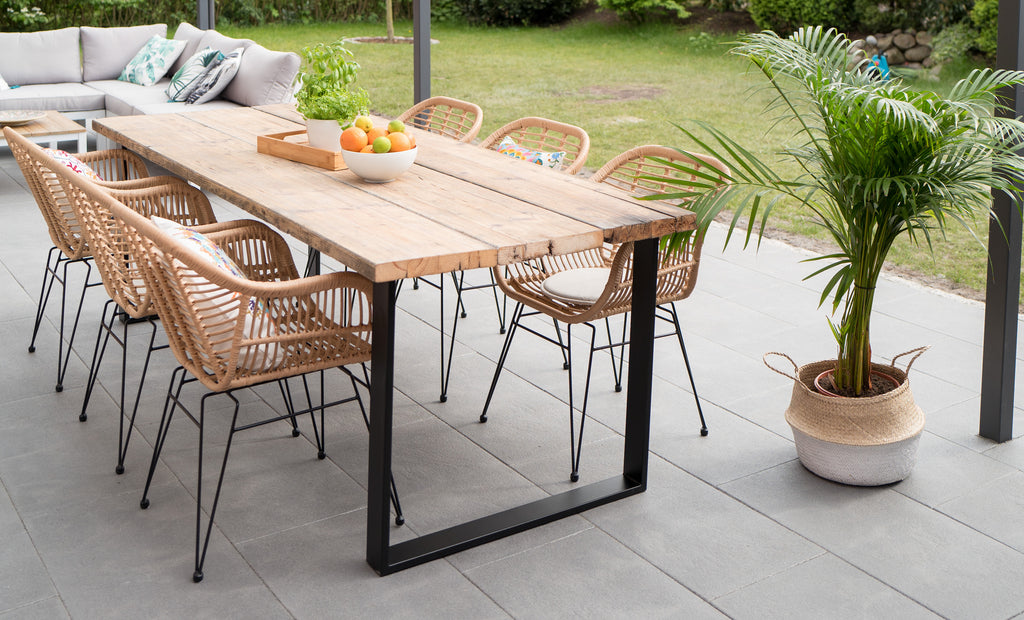
Thank you very much Julia for the image material and your insight into the construction of the garden table. We hope to just inspire the construction of your own table!


Leave a comment
This site is protected by hCaptcha and the hCaptcha Privacy Policy and Terms of Service apply.